Installing and configuring the fastest possible WordPress stack on Ubuntu 16.04
Ubuntu 16.04 LTS reached end of life back in 2021 and no longer receives security updates, and the PHP 7.0 and Percona Server 5.7 used below are long superseded. I have kept this guide intact as a reference, but please do not build a new server from it.
If you are setting up a fresh server today, follow my current guide, Installing the fastest WordPress stack with Ubuntu 18.04 and MySQL 8, which uses a newer Ubuntu LTS and MySQL 8. The steps below remain here for anyone still maintaining an older Ubuntu 16.04 box.
This article presumes you have a fresh Ubuntu 16.04 server and you can log into it. I recommend using SSH keys if you can, but that doesn’t affect this article.
Install PerconaDB
Run the following commands to install PerconaDB:
wget https://repo.percona.com/apt/percona-release_0.1-4.<span class="k">$(</span>lsb_release -sc<span class="k">)</span>_all.deb
dpkg -i percona-release_0.1-4.$(lsb_release -sc)_all.deb
apt-get update
apt-get upgrade
apt-get install percona-server-server-5.7 -q -y
Note: The Percona installation will ask you for a root password. This is the root password for your database and nothing to do with the root password for your server. If you wish, leave the password blank and it will still be secure because remote logins will be disabled.
Install Nginx and PHP 7
Run the following to install Nginx and PHP 7:
apt-get install nginx -y
apt-get install php -y
apt-get install -y tmux curl wget nginx php7.0-fpm php7.0-cli php7.0-curl php7.0-gd php7.0-intl
apt-get install -y php7.0-mysql php-memcached php7.0-mbstring php7.0-zip php7.0-xml
# now we need to temporarily set up nginx to work over HTTP so we can install WordPress and create SSL certificates
git clone https://github.com/dhilditch/wordpress-rocket-stack /root/wordpress-rocket-stack/
cp /root/wordpress-rocket-stack/etc/nginx/* -R /etc/nginx/
rm /etc/nginx/sites-enabled/default.conf
ln -s /etc/nginx/sites-available/install.wordpress.rocketstack.conf /etc/nginx/sites-enabled/
wget https://wordpress.org/latest.zip -P /var/www/
apt-get install unzip
unzip /var/www/latest.zip -d /var/www/
mv /var/www/wordpress /var/www/rocketstack
chown www-data:www-data /var/www/rocketstack -R
rm /var/www/latest.zip</pre>
<pre>#if we are on a single CPU host, run the following
mkdir /etc/systemd/system/nginx.service.d
printf "[Service]nExecStartPost=/bin/sleep 0.1n" > /etc/systemd/system/nginx.service.d/override.conf
systemctl daemon-reload
service nginx restart
Ok – so now point your domain name at the IP address of your server, and when you visit you should see the WordPress installation screen.
We need a database, and we also would like SSL for *after* WordPress installation – unfortunately, installing WordPress using SSL is buggy, but it’s easy to switch AFTER installation.
Connect to mysql using:
mysql
Or if you entered a password for root, you’ll need to connect using this:
mysql -u root -P
Then run the following SQL:
create database rocketstack;
grant all privileges on rocketstack.* to rs@localhost identified by 'CHOOSEASTRONGPASSWORD';
Visit your domain URL through a browser and you’ll see the WordPress installation screen. Choose your language, then the 2nd screen will ask you for the database name, database user name, and database password – use the strong password you used in the last line.
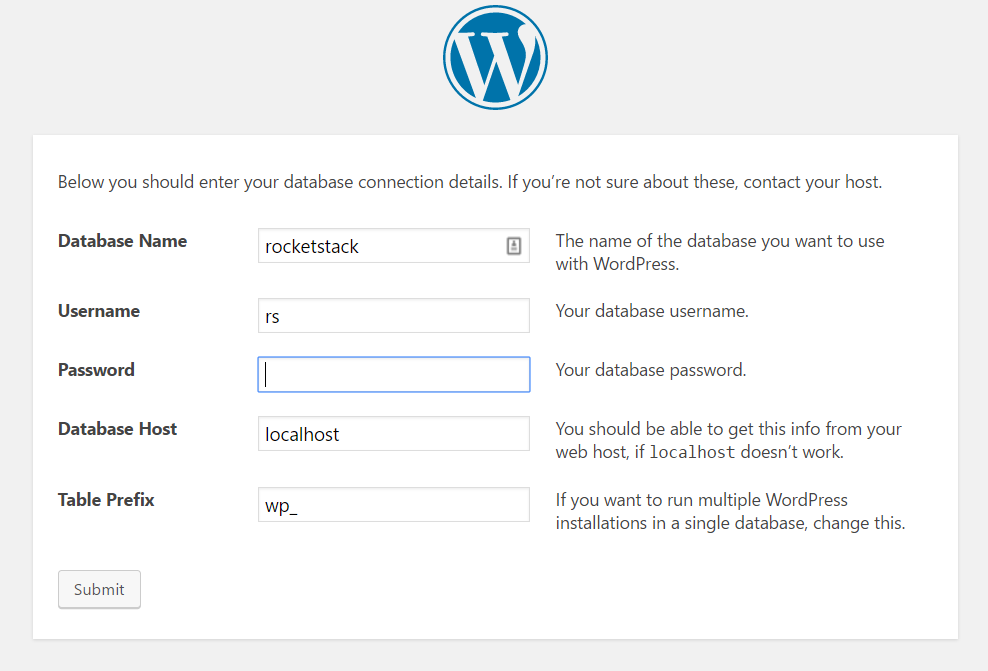
Once you have entered those details, continue through to finish your WordPress installation. Once done, we will install SSL and the rest of the components.
Install SSL using Letsencrypt
Letsencrypt gives you free SSL certificates and I’ve simplified the scripting of this for you.
git clone https://github.com/letsencrypt/letsencrypt /opt/letsencrypt
mkdir /var/www/acme/
chown www-data:www-data /var/www/acme
Edit /etc/nginx/snippets/acme-challenge.conf and replace yourdomain.com with your actual domain – this is on one line, and that line looks like this:
return 307 $scheme://acme.yourdomain.com$request_uri?redirect=yes;
So, if for example you have the domain www.superspeedyplugins.com, it would become:
return 307 $scheme://acme.www.superspeedyplugins.com$request_uri?redirect=yes;
service nginx restart
/opt/letsencrypt/letsencrypt-auto certonly -a webroot --webroot-path=/var/www/acme/ -d yourdomain.com -d www.yourdomain.com --agree-tos
crontab -e
0 5 1 * * /opt/letsencrypt/letsencrypt-auto certonly -a webroot --webroot-path=/var/www/acme/ -d yourdomain.com -d www.yourdomain.com --renew-by-default
Now, we want to disable the temporary nginx conf file used and replace them with the production settings.
Edit the file /etc/nginx/sites-available/varnish.rocketstack.conf and replace the 2 SSL lines with the correct location of your newly generated SSL files – this involves simply replacing yourdomain.com on these 2 lines:
ssl_certificate /etc/letsencrypt/live/yourdomain.com/fullchain.pem;
ssl_certificate_key /etc/letsencrypt/live/yourdomain.com/privkey.pem;
Once you have edited that file, we will remove the temporary nginx config and enable production config.
ln -s /etc/nginx/sites-available/wordpress.rocketstack.conf /etc/nginx/sites-enabled/
ln -s /etc/nginx/sites-available/varnish.rocketstack.conf /etc/nginx/sites-enabled/
rm /etc/nginx/sites-enabled/install.wordpress.rocketstack.conf
service nginx restart
Install and configure Varnish
apt-get install varnish
cp /root/wordpress-rocket-stack/etc/varnish/default.vcl /etc/varnish/default.vcl
service varnish restart
Installing Redis
apt-get install redis-server
apt-get install php-redis
maxmemory 128mb
maxmemory-policy allkeys-lru
service redis-server restart
service php7.0-fpm restart
For more detail on getting the most out of Redis as an object cache, see Configuring Redis for WordPress and WooCommerce for Maximum Performance.
Optimising PerconaDB Config
[mysqld]
key_buffer = 512M
max_allowed_packet = 512M
thread_stack = 192K
thread_cache_size = 8
query_cache_limit = 512M
query_cache_size = 4192M #(or 0 can improve performance, it depends)
innodb_buffer_pool_size = 20000M #(according to your memory - as a guide, use 60% of your memory here)
innodb_buffer_pool_instances = 16 #(according to how many cores you have)
innodb_io_capacity = 5000 #(because Digital Ocean use fast SSDs so we don't want InnoDB to be limited)
[mysqld]
key_buffer = 51M
max_allowed_packet = 51M
thread_stack = 19K
thread_cache_size = 8
query_cache_limit = 51M
query_cache_size = 419M
innodb_buffer_pool_size = 2000M
innodb_buffer_pool_instances = 16
innodb_io_capacity = 5000
Installing and configuring fail2ban
sudo apt-get install fail2ban
cp /etc/fail2ban/jail.conf /etc/fail2ban/jail.local
Create /etc/fail2ban/filter.d/wordpress.conf and add the following lines:
[Definition]
failregex = ^.*POST.*(wp-login.php|xmlrpc.php).* (403|499)
Then edit /etc/fail2ban/jail.conf:
Change bantime at top to 86400 (1 day instead of 10 minutes)
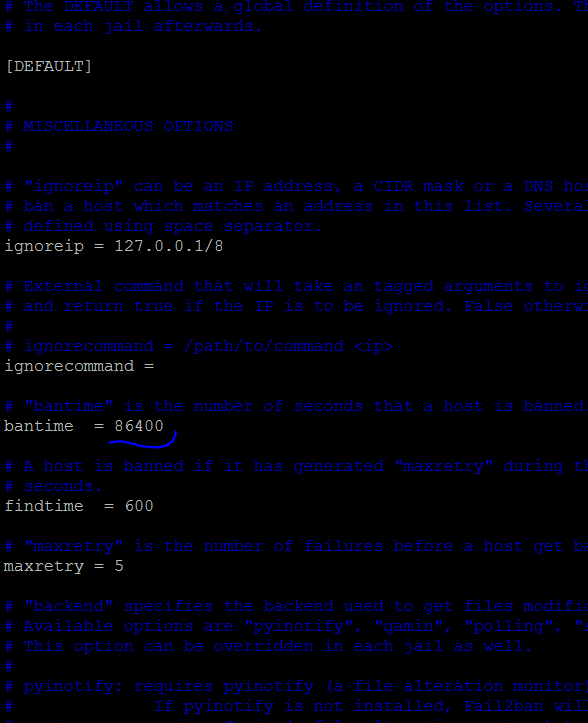
Find [nginx-http-auth] and add below it:
enabled=true
So, it should look something like this:
[nginx-http-auth]

enabled = true
filter = nginx-http-auth
port = http,https
logpath = /var/log/nginx/error.log
Add the following after the nginx section in the jail.conf:
[wordpress]
enabled = true
port = http,https
filter = wordpress
logpath = /var/log/nginx/*access.log
maxretry = 10
Then restart fail2ban with:
service fail2ban restart
For fail2ban to ban the right offenders behind Cloudflare, nginx needs to log the visitor’s real IP rather than Cloudflare’s. See Configuring NginX to pass through real IP Addresses from Cloudflare for the details.
Installing and configuring W3 Total Cache
I’ve tried all of the caching plugins, but the free version of W3 Total Cache is the best – just be sure to avoid using it to compress files (we already compress through Nginx) and don’t use their minification (if you want minification, use Cloudflare instead).
Here are the settings I tend to use:
Page caching: Disk Enhanced
Object caching: Redis
Browser Caching: Yes, then modify browser caching settings to enable adding the expires header and all other headers, but untick ‘compress’ files.
Reverse proxy: Tick the checkbox and enter 127.0.0.1 in the textarea so your local varnish cache can be purged.
Cloudflare Configuration
The above configuration files include configuration to pass through the correct IP addresses from your visitors, even when using Cloudflare, meaning fail2ban will work properly, but there are still some Cloudflare settings to edit:
Caching -> Browser expiration -> change to 1 year
Caching -> Caching Level -> change to No Query String
Speed -> Autominify -> tick JS and CSS
Speed -> Rocket Loader -> change to automatic
Crypto -> SSL -> Change to FULL
For a fuller walkthrough of the settings I recommend, see Configuring Cloudflare for WordPress and WooCommerce.
Results with GTMetrix
The GTMetrix score, like all the page-speed analysers (Pingdom etc) doesn’t actually take server-response-speed into account in their score. That might sound odd, and it is.
The speed that matters the MOST for your website being able to scale is the TTFB – time to first byte. It’s important that uncached this stays below 500ms. You can install the Query Monitor plugin and you’ll see the uncached TTFB along your admin bar.
Running GTMetrix over a site I installed the above stack onto, I get the following results:
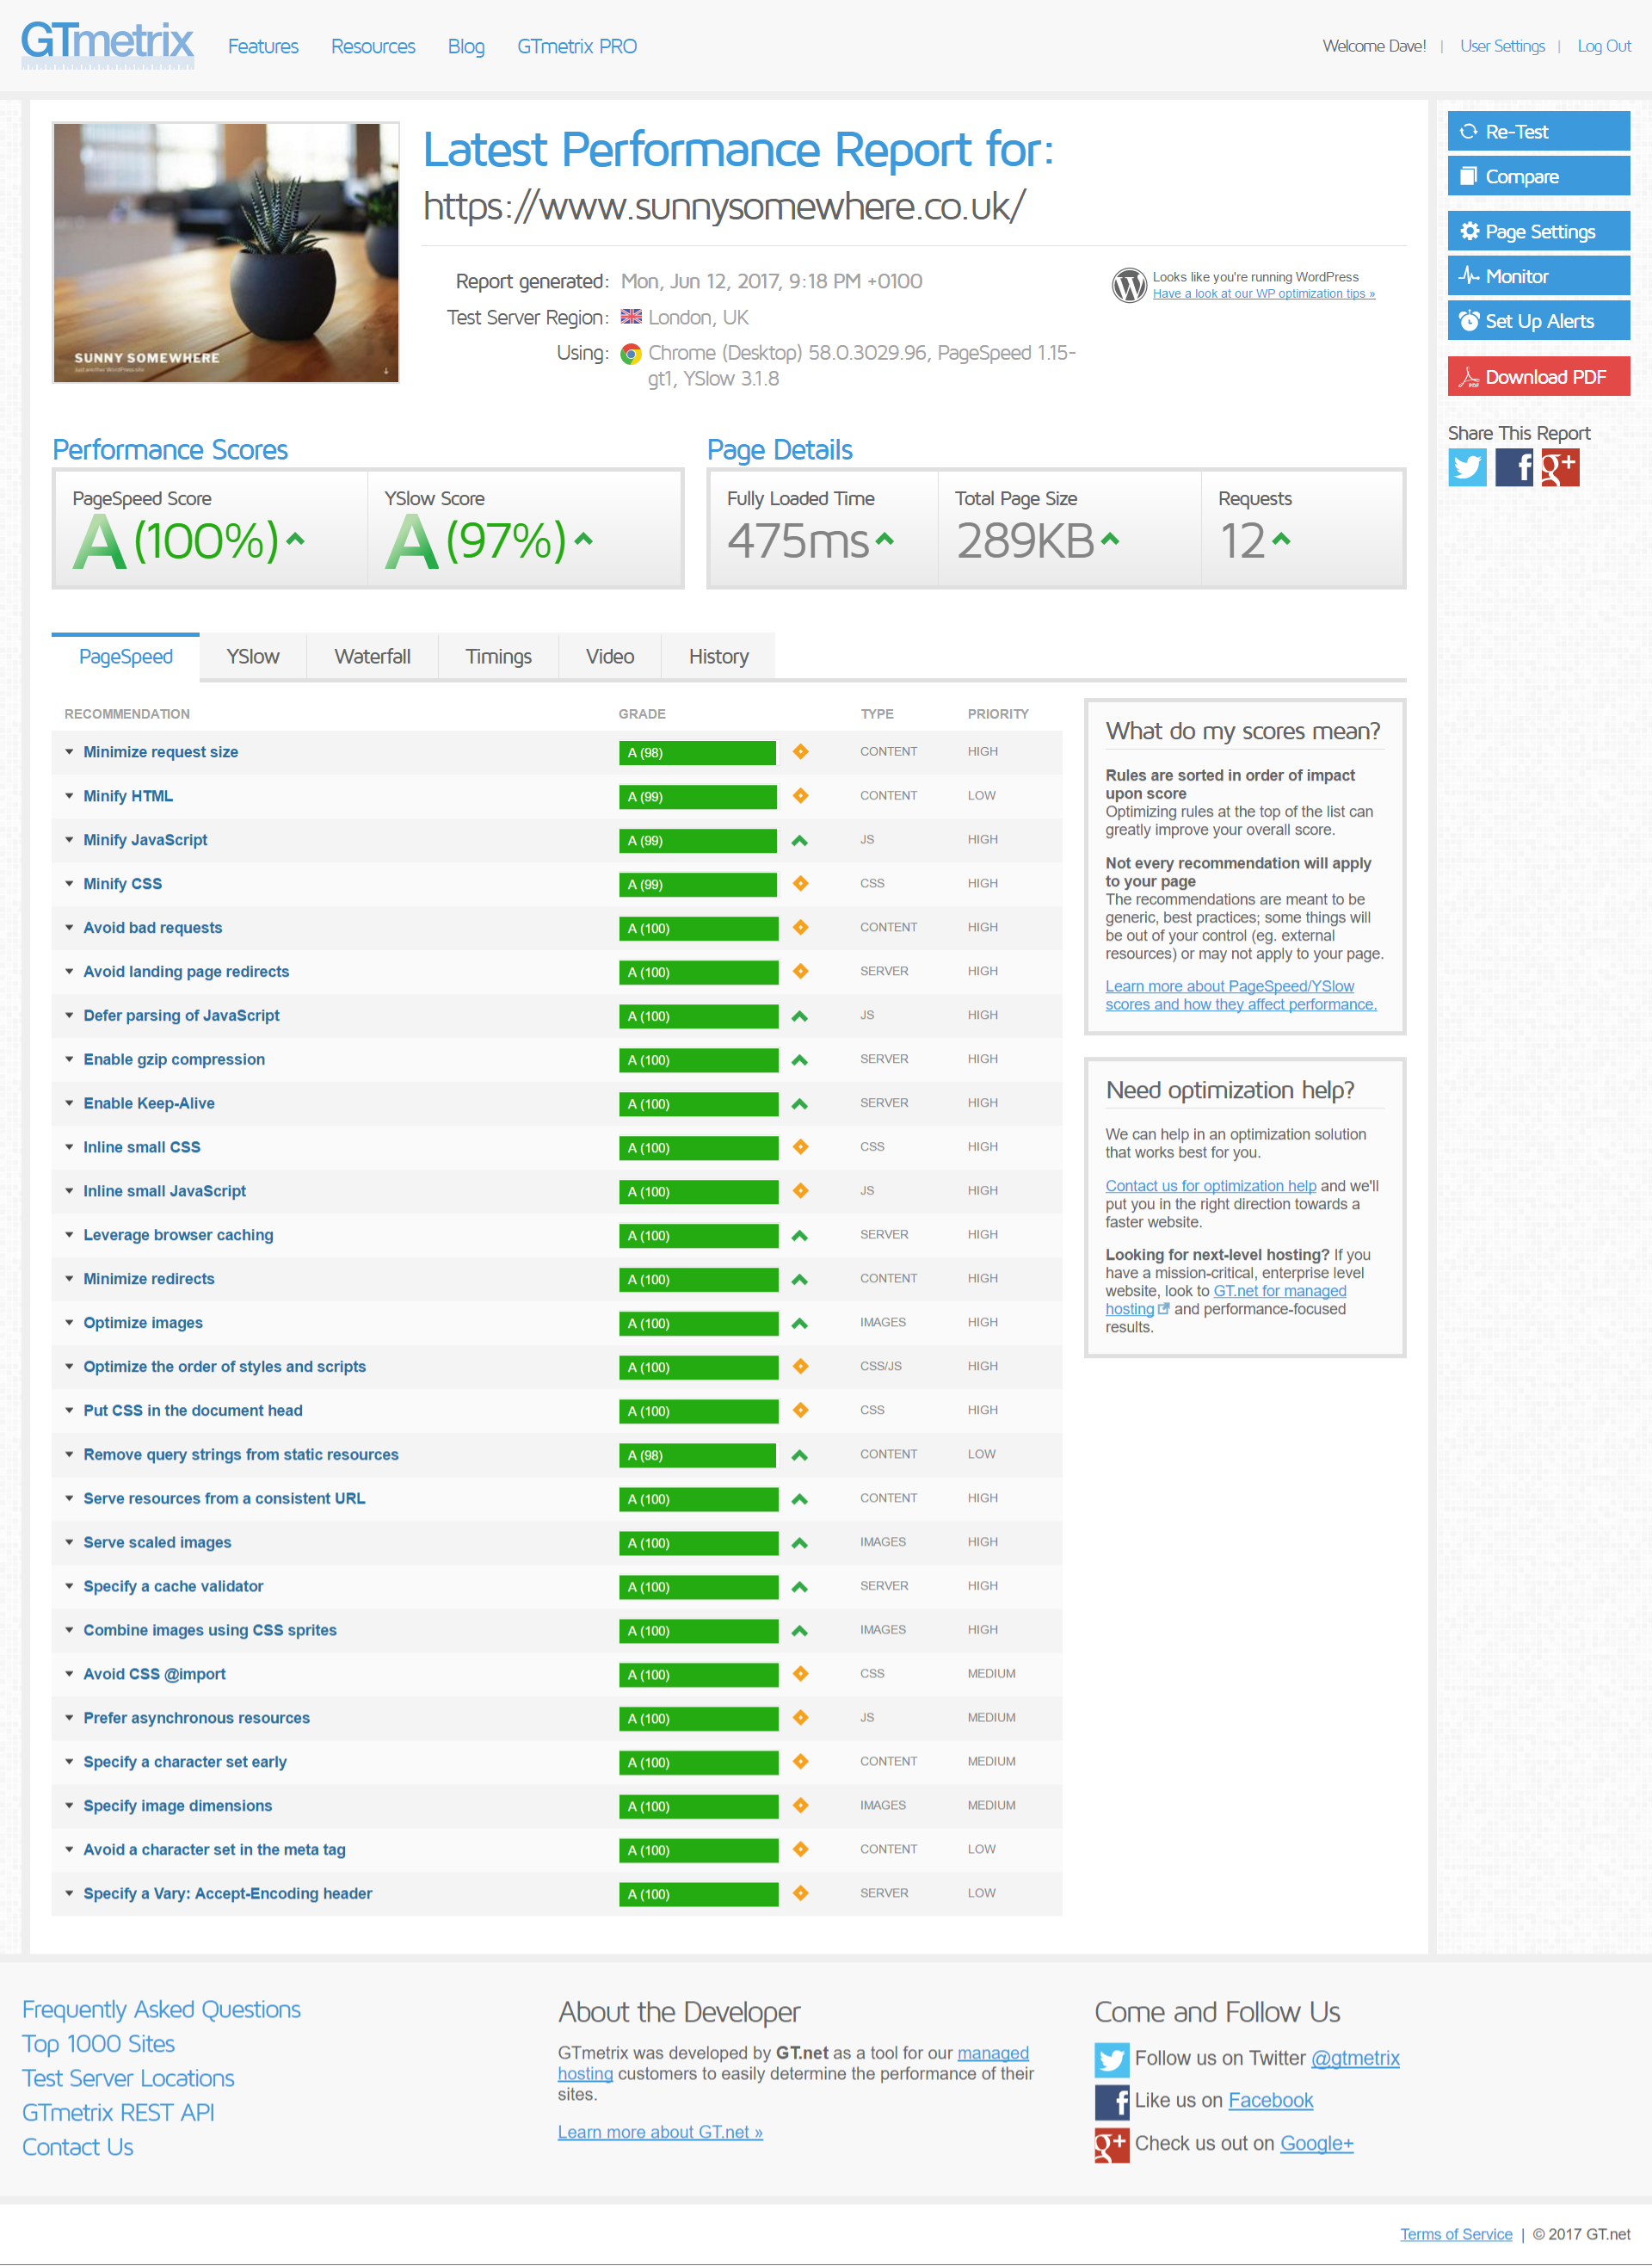
Note: you have to click the ‘Waterfall’ tab to view the TTFB speed:
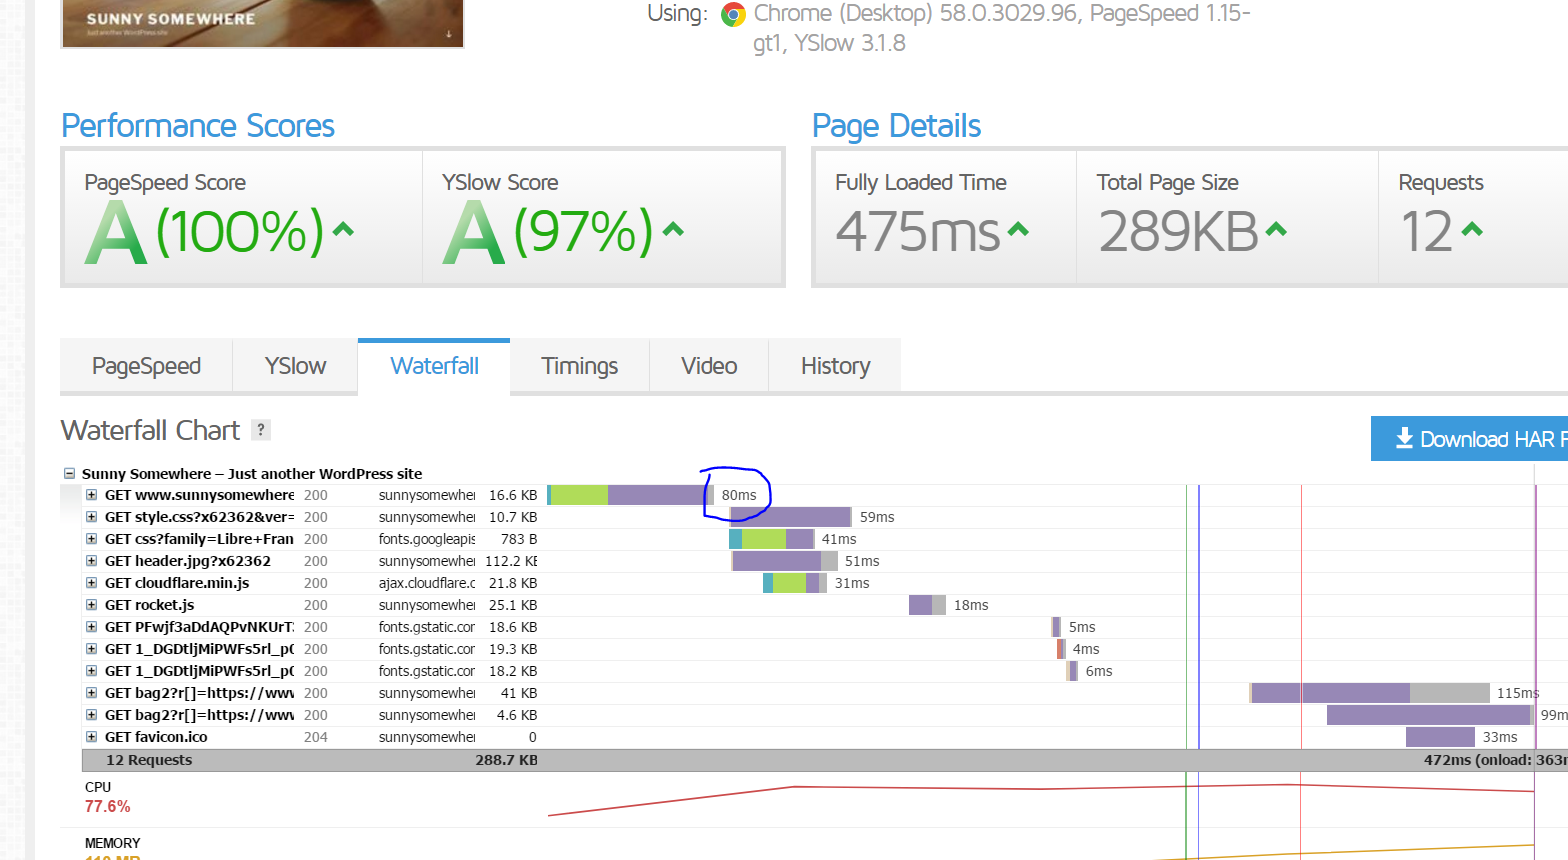
That’s it.

Thank you very much for this guide. What i wish to see if possible is another layer of how to control and maintain this installation in order to avoid having a broken website/server.
That would be really fabulous if you could explain.
Thanks,
Luigi