A tour of the import mapping screen
The screen where you set up an import was rebuilt to make mapping a CSV to WordPress fast and obvious. This article walks through every part of it, so you know what each control does before you run your first import.
Open it from Super Speedy → Super Speedy Imports → Config, then pick an import (or start a new one). The screen has two columns: the mapping form on the left, and the Import Fields panel on the right that shows your CSV.
The header
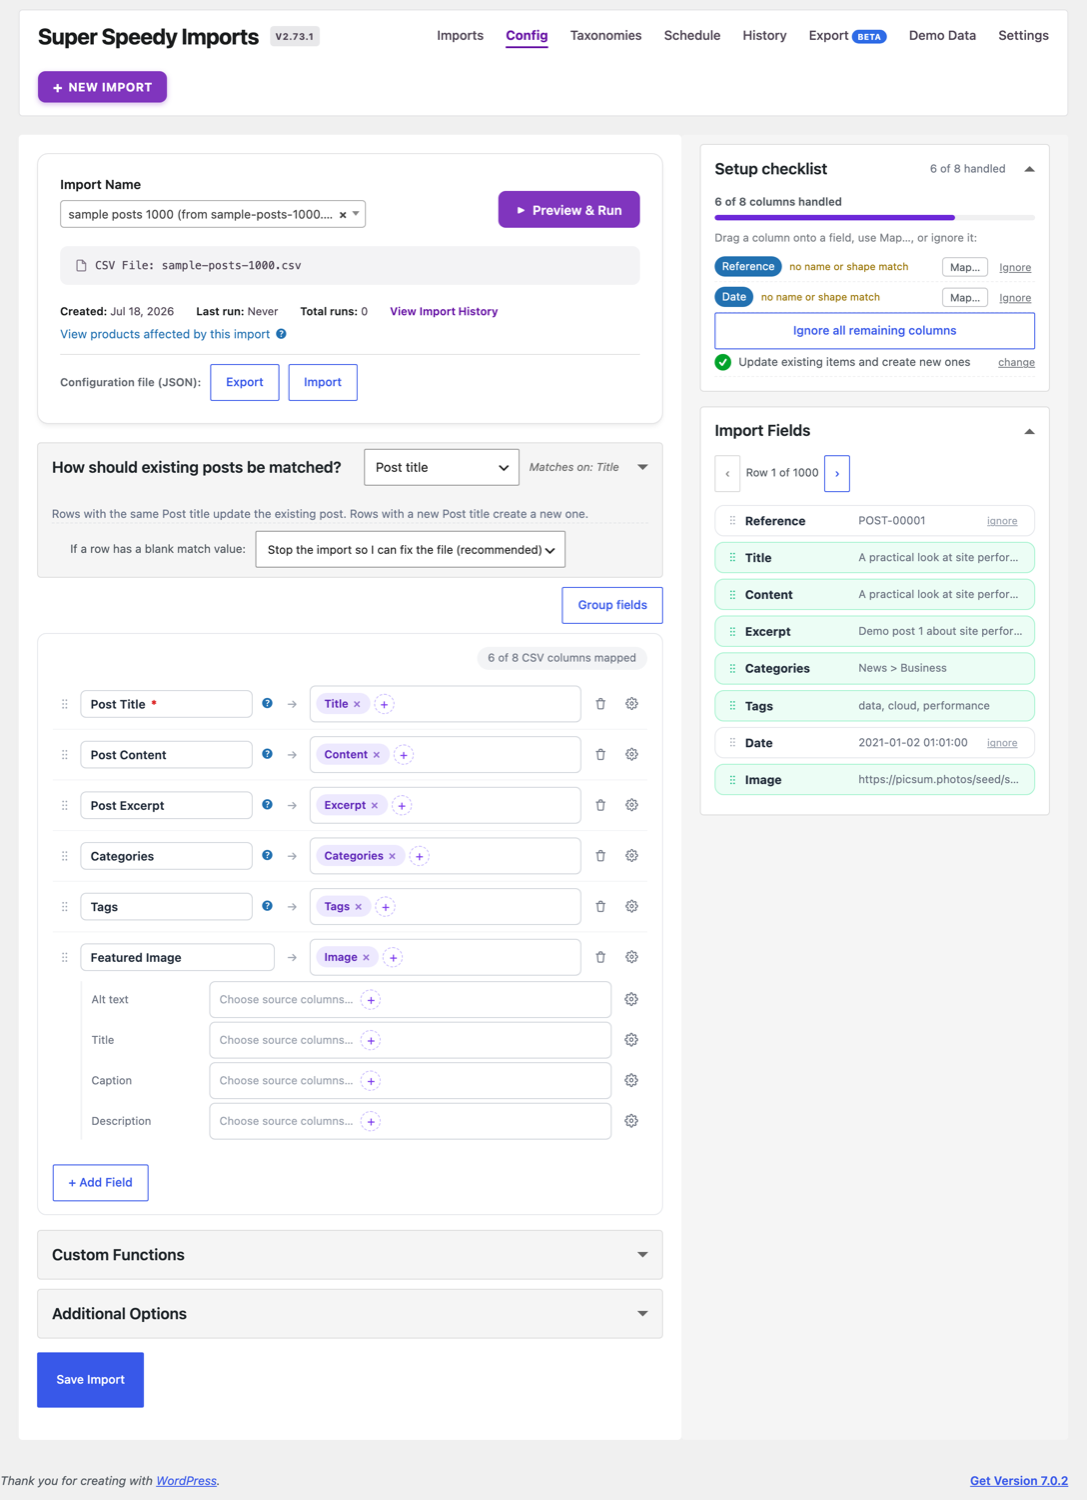
At the top you choose which saved import you are editing, see its CSV file and run history, and start a run with Preview & Run. The Configuration file (JSON) Export and Import buttons save and load the whole field mapping, so you can copy a set-up between imports or sites without redoing it.
How existing items are matched
The "How should existing posts be matched?" box is the one place matching is decided. Pick the field that identifies a row uniquely (Post title, SKU, a custom identifier, and so on). Rows whose match value already exists get updated; new values create new items. You also choose what happens when a row’s match value is blank; the safe default is to stop the import so you can fix the file.
The mapping rows
Each row maps one WordPress destination to one or more CSV columns.
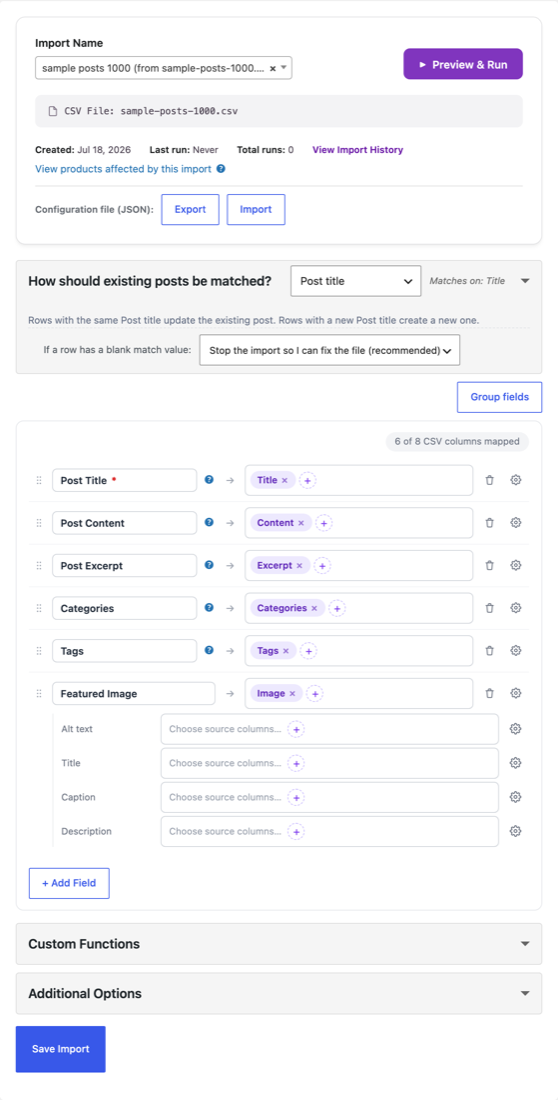
Reading a row left to right:
- Drag handle: reorder rows, or drag to group them.
- Destination field: the WordPress field being filled (Post Title, Post Content, a taxonomy, a product field, a custom field, and so on).
- Arrow: points from the destination to its source.
- Source pills: the CSV column(s) feeding this field. Click the + to add a column; each column shows as a removable pill. Mapping more than one column into a field merges them.
- Delete: removes the row.
- Cogwheel: opens the advanced options for that field (see below).
A counter above the rows shows how many CSV columns are mapped, so you can see at a glance what is still unhandled.
The cogwheel: advanced per-field options
Most fields need nothing more than a column pill. The cogwheel is there when you want more: merging several columns with your own separators or literal text, editing content in a rich editor, or (in Pro) transforming a value with a custom PHP function. A field whose cogwheel holds more than plain pills is marked so you can spot it.
Grouped vs ungrouped views
The Group fields button toggles how the rows are arranged. Ungrouped (the default) is one flat list. Grouped clusters related rows (for example a featured image with its alt, title, caption and description) so long mappings stay tidy. Product attributes, galleries and custom fields appear as their own rows inline in both views.
The Import Fields panel
On the right, every column in your CSV is a draggable chip card showing a sample value from the row you are previewing. Step through rows with the arrows at the top ("Row 1 of 1000").
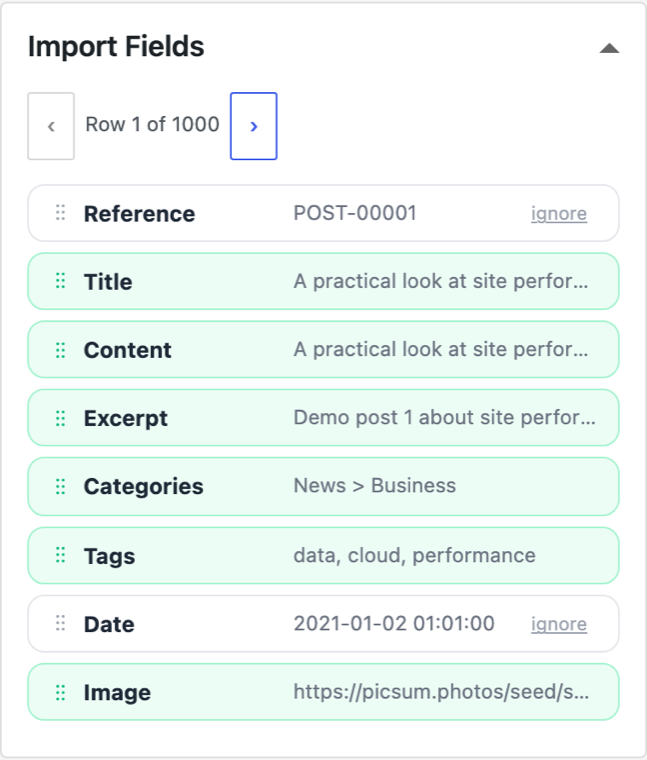
- Drag a chip onto a destination field to map it, instead of using the + picker.
- A column fills green once it is used by a mapping, so unmapped columns stand out.
- Columns you do not want to import show an ignore button; ignoring one keeps it out of the "unmapped" count without mapping it.
- Hover a card to see the full content of the currently previewed row for that column.
Required fields and running
Some destinations are required before an import can run (at minimum a match field and the payload it needs). Until those are set, Preview & Run will tell you what is missing. Once everything required is mapped, Preview & Run shows a summary and starts the import.
The Setup checklist (Beta)
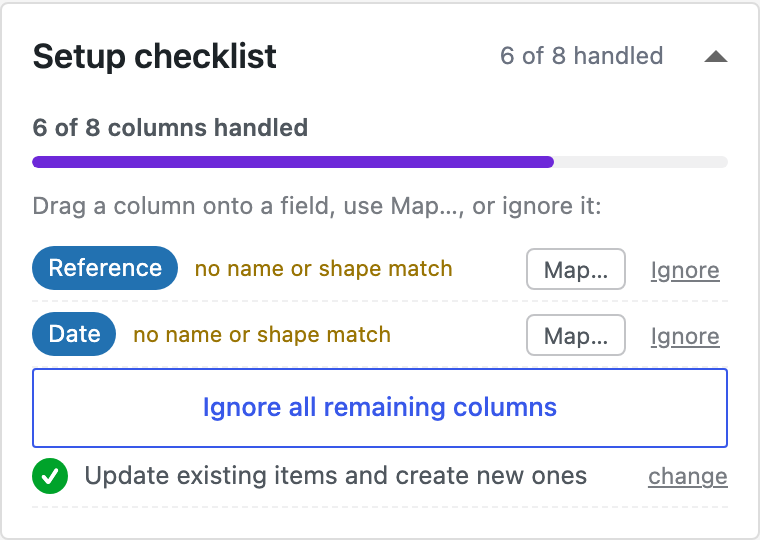
If you turn on Settings → Beta features → Setup checklist, a card appears above Import Fields listing every column that is not yet mapped or ignored, with quick Map… and Ignore actions and a progress bar. It is an optional triage aid for wide CSVs; leave it off if you prefer the plain Import Fields panel.
Saving
Save Import stores the mapping so you can re-run it later or on a schedule. Preview & Run also works without saving first, but saving keeps the configuration for next time.

Comments